Greetings Citizen, if you have ever dreamed of building one of the allmighty reavers, powerful machine-gods of the mechanicum, rejoice! fou our scribes have travelled to the depths of the forge world of Voss to learn the secrets of its construction from the venerable archmagos Cerverus.
Salutacions ciutadà, si has somiat mai de construïr un dels totpoderosos reavers, poderosos déus-màquina dels mechanicum alegra't! donçs els nostres han viatjat a les profunditats del món forja de Voss per aprendre els secrets de la seva construcció del venerable arximagos Cerverus.
The first step in building your reaver is to download it's templates from the following link: http://es.scribd.com/doc/58879350/Reaver-Titan-Templates. Here you will find the measures for all the parts, but beware! because the plans are thought for paper, and you will find some problems when passing to foamboard. Also i decided to add some changes to the plans to improve the aspect of the titan.
El primer pas per construïr el teu reaver és descarregar-se les seves plantilles del link següent: http://es.scribd.com/doc/58879350/Reaver-Titan-Templates. Aquí podràs trobar les mesures per totes les parts, peró ves amb compte! perquè els plans estan pensats pel paper i trobaràs alguns problemes al passar a cartró pedra. Alhora vaig decidir afegir alguns canvis als plànols per millorar l'aspecte del tità.
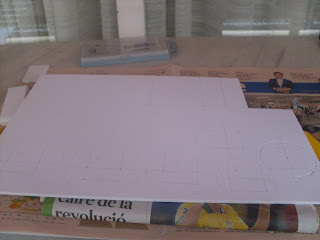
Firstly cut the foot template and start building it in 3mm foamboard.
Primerament talles la plantilla del peu i la començes a construïr.
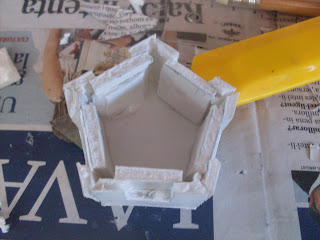
The first problem that i found was in the box that houses the finger, it's too big to put all of the five boxes inside the foot. So i decided to put instead of them a foamboard plate to close the finger entrance as is shown in the pic below.
El primer problema que em vaig trobar fòu la capsa que allotja el dit, és massa gran per posar totes les cinc capses dintre del peu. Així que vaig decidir posar al seu lloc una placa de catró polma per tancar l'entrada del fit com s'aprecia a l'imatge de sota.
It is also necessary to cut slightly inwards the left and right of each of the five "gates" that open in the exterior of the foot to fix one with the other by their sides. Above you can appreciate it.
També és necesari tallar lleugerament cap a dins la dreta i esquerra de cada una de les cinc "portes que s'obren a l'exterior del peu per fixar una amb l'altra pels seus costats. A dalt es pot observar.
The foots finished: to add more endurance to the conjunt i added two pentagons at their base to close them by below.
Els peus acabats: per afegir més resistència al conjunt vaig afegir dos pentàgons a la base per tancar-los des de sota.
The fingers: you will have to deduct 6mm to the central sections of the finger to maintain sizes.
Els dits: hauràs de restar 6mm de les seccions centrals del dit per manetnir mesures.
When putting together the fingers the result will be better if you stick all them at the same time, correcting their places to manage a perfect holding to the ground.
Quan posis els dits junts el resultat serà millor si els enganxes tots a la vegada, corretgint els seus llocs per aconseguir un suport perfecte sobre el terra.
The next step is to build the shins. I wanted a tubular support for my legs, so I picked some medicine's tubes. But them asked for more space in the top of the shin that that shown in the template; I nedded a bigger leg, so I made four circles of 7, 8, 9 and 10 cmt with a central prisma of 4x4x10 cmt.
The medicine tubes will be linked to the hip with curd containers.
El pas següent és construïr lles canyelles. Volia un suport tubular per les meves cames, així que vaig agafar alguns tubs de medicina. Peró aquests necessitaven més espai a la part superior de la canyella, necessitava una cama més gran, així que vaig fer quatre cercles de 7, 8, 9 i 10 cmt amb un prima central de 4x4x10 cmt.
Els tubs de medicina estaran units a la cadera amb envasos de quallada.
As with the fingers you'll substract 6mm to the central sections of the prisma, deducting 3mm for each foamboard wall.
Cam amb els dits trauràs 6mm a les seccions centrals del prisma, restant 3mm per cada paret de cartró ploma.
The finished shin.
La canyella acabada
The third step is to build the armour. As the leg was bigger i made a bigger plate thanthat on the plan, extending it to 13 cmt of height.
El tercer pas és construïr l'armadura. Com la cama era més gran vaig fer una placa més granm que el plànol, extenent-la a 13 cmt d'alçada.
The three aquilas: pink for the torso, yellow for the legs.
Les tres aquiles: rosa pel tors i grogues per les cames.
When sticking the aquila and parchements to the armour, it's important to be generous with the glue to assure the best subjection of the decorations when enveloping the leg squeleton; let it dry and then stick the armour to the leg subjecting it with rubber bands.
Quan enganxis l'aquila i els pergamins a l'armadura, és important ser generós amb la cola per assegurar la millor subjecció de les decoracions quan envoltis l'esquelet de la cama: deixa-ho assecar i llavors enganxa l'armadura a la cama aguantant-la amb gomes de pollastre.
Experimentally i tried to curve the aquila previously, but the results where pretty much the same.
Experimentalment vaig intentar corbar l'aquila prèviament, peró els resultats eren els mateixos.
Add two circles to the top and bottom of the leg to make it easier to link with the other parts.
Afegeix dos cercles a dalt i baix de la cama per facilitar l'unió amb les altres parts.
Magos Cerverus inspects the finished legs. note the flaming eagle head, the symbol of my own titan legion: the LEGIO AQUILARUM.
El Magos Cerverus inspecciona les cames acabades. Fixeu-vos en el cap flamejant de l'àliga, el símbol de la meva pròpia legió de titans: la LEGIO AQUILARUM


